Wednesday, March 28, 2012

My Ikea Sewing Table Refinished with a Sparkly Glitter Top is Done!!!

I coated it 3 times with the resin & then my husband helped me add trim around the edge which I sanded & painted today! It's looking fabulous & I will move it back into the craft room tonight! Can't wait to get sewing some unicorns or something on it! :)
Up close sparkle appreciation shot.
This is the original post where I first began work on this table.
You can do this too! If you have any questions, leave a comment & I'll try my best to get back to you!

Get crafty!!!

Sunday, March 18, 2012

The Easter bunny is thinking about dying easter eggs soon.

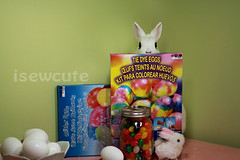
Now with St. Patrick's day over, we're getting ready for Easter! My kiddos are so caught up in every holiday's magic & wonderment. We have bunny pictures hanging up in unexpected places & easter egg pictures hanging from the chandelier & my kitchen cabinets. I'm trying to think of some fun springtime crafts that I can do with the kids. It would be fun to make some paper chains & a bunting....and of course we'll be decorating eggs when it gets closer to the holiday. I have some traditional Ukranian psyanky dyes & wax... perhaps the kids are old enough this year! We'll see!
Happy Spring!

Wednesday, March 14, 2012

isewcute is at it again & it's national craft month, so let's glitter another ikea table & make it a work of art!

You may remember my glittery pink table that I submitted to ikea hackers last year. Well, I'm at it again! This time in silver and black!
Today it was so incredibly warm & sunshiney, and my ikea 'lack sofa table' which I've been using as my sewing table sure could've used some glitter-goodness, so I grabbed my resin, paint, masking tape & silver glitter & got busy!
This is the look I was going for! I can't wait to take off the painter's tape, & finish the legs & get it back into my craft room, but alas...resin takes it's sweet time to set up.

So if you'd like to glitter your own table surface, you can do it!
I started out with this...not too pretty after 10 plus years I know it was very chipped along the edges & beat up.
I masked off the table's edge & the top portion of the legs so they wouldn't get gobs of resin or paint on them.
Then I sprayed metallic silver paint on the top.
While the paint was tacky, I tossed on the first layer of glitter.
Someone asked me how much glitter it takes & it really doesn't take much at all...(I used approximately 1-3 Tablespoons worth on this project). It's whatever you want really, because painting the surface first preps it & it all blends together.
Then finally I've mixed up my 2 part resin & added a dash of glitter to that for good measure. I poured it right down the center of the table & then with a sponge brush...smoothed it out to the edges & let it cure.
After a couple hours, I mixed up another cup of resin & did the same thing...so there's a nice ultra thick coat of glossy resin on there.
I love how this sparkles!
This is magical!!!
Now all I have to do is be patient & wait! I will share photos when it's finished. If you have any questions about this project, just leave a comment! I'd love to hear from you!

*Stay Sparkly!*

Thursday, March 8, 2012

BLUE MAN GROUP LOVE

Having fun this morning playing with some GI Joe dolls... just because.
I saw a Blue Man Group performance years ago & it was one of the most incredible theatrical experiences ever. If you have the chance to see them... just do it! There's nothing else that can compare. I also have one of their albums... the music is fantastic! It's great to listen to while drawing. :)

Monday, March 5, 2012

Yuki changing from baby bunny to all grown up with bowl 5 month difference photos by isewcute

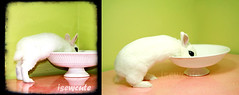
I recently had another fun photoshoot with Yuki, our little darling hotot bunny & even though she is still relatively small, she has grown quite a bit! Now she doesn't have to stand on her tippy toes to reach into the bowl... same bowl in both photos.